How to Attach Pictures in Email The Right Way on Any Device
Attaching a picture to an email seems simple enough, right? Just hit that little paperclip icon, pick your file, and you're done. But as many of us have learned the hard way, what seems easy can quickly go wrong, leading to bounced emails, frustrated recipients, and even security headaches.
Why Getting Photo Attachments Right Still Matters
We've all been there. You send a crucial design mock-up to a client, only to find out it arrived blurry or embedded weirdly in the email body. Or worse, you get that dreaded "send failed" notification because the file was just too big. These aren't just minor annoyances; they can make you look unprofessional.
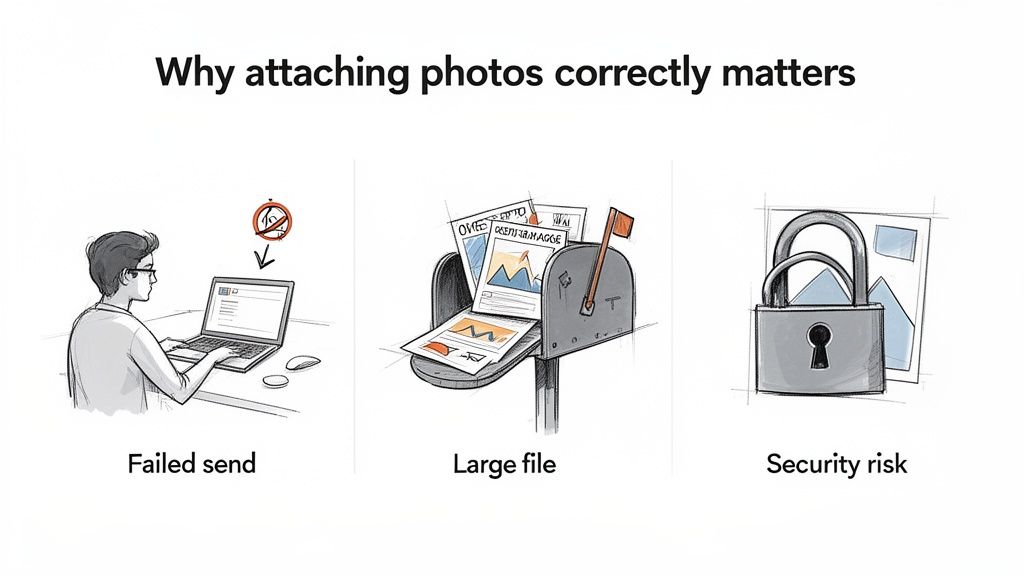
Nailing this basic skill is key for a few important reasons:
- Looking the part: A properly attached photo sends a clear, professional message.
- Making sure it arrives: Oversized images are a one-way ticket to getting your email rejected by the recipient's server.
- Staying safe: Email attachments are still a favourite tool for hackers trying to spread nasty viruses.
Think about it from a real-world perspective. You’re a busy UK freelancer trying to email a photo of a receipt to your accountant. You’re in a rush, you click on something that looks like a confirmation link, and suddenly your whole inbox is compromised.
It's a scary thought, but a UK Government survey found that 83% of businesses hit by a cyber attack pointed to phishing emails as the cause, with attachments being a major weak spot. This really drives home why even simple tasks like sending a receipt need a bit of care. It's also why exploring a solid document management system is a smart move for keeping your files organised and secure.
Sending Photos From Your Favourite Email App
Right, let's get this sorted. Knowing how to attach a picture to an email should be second nature, but things can look a little different depending on which app you're using. We'll walk through the process for the big three: Gmail, Outlook, and Apple Mail. This way you're covered whether you're at your desk or on the go.
The one thing to look for, almost universally, is the paperclip icon. Your mission is to find it, click it, and then pick your photo. It’s usually that simple, but its hiding spot can change. Let's pinpoint where it is on each platform so you can get your images sent without any faff.
Attaching Pictures in Gmail
As one of the most popular email clients out there, Gmail is a great place to start. Thankfully, whether you're on your computer or your phone, the process is quick and feels pretty much the same.
On Your Desktop (Web Browser): When you fire up a new email in Gmail, you’ll see a toolbar pop up at the bottom of the compose window. The paperclip icon is sitting right there, usually between the formatting options and the "insert link" icon.
- Hit the Compose button to start a new message.
- In that bottom toolbar, click the Attach files paperclip icon.
- Your computer's file browser will open up. Just navigate to where your picture is saved, select it, and click Open.
You'll see a little thumbnail of the image appear at the bottom of your draft, ready to go.
On Your Mobile (Gmail App): The mobile app makes things just as easy, but the paperclip moves to the top right of the screen.
- Tap the Compose button (it’s the one that looks like a pencil).
- Look to the top right and tap the paperclip icon.
- Choose Attach file to look through your phone's storage, or pick from recent photos or cloud drives like Google Drive.
My Two Cents: When sending from your phone, many apps will ask if you want to shrink the image. If it’s an important photo where quality is key, always choose 'Actual Size' or 'Original'. You don't want to send a blurry, pixelated version by mistake.
Sending Photos with Outlook
Outlook keeps things simple and recognisable, whether you’re using the desktop application or the web version. Once again, that trusty paperclip icon is what you're looking for.
On Desktop (App and Web): The experience is virtually identical across the Outlook program and the Outlook.com website. Once you create a New email, you'll spot the attachment option in the top ribbon.
- Click on Attach File (the paperclip).
- A dropdown menu will give you some options. You can Browse This PC to find your picture or select one from your recent files.
- Find your photo, click on it, and then hit Insert.
For anyone juggling a busy inbox, learning how to automatically forward emails from Outlook can be a real game-changer, especially for managing things like receipts.
Using Apple Mail
If you’re in the Apple ecosystem, Mail gives you a clean, integrated way to handle attachments on both your Mac and your iPhone or iPad.
On a Mac (Desktop App): No surprises here, as Apple Mail uses the classic paperclip.
- Open the Mail app and click the New Message icon.
- Click the paperclip icon in the toolbar at the top of the new message window.
- A Finder window will appear. Just find and select your picture, then click Choose File.
On an iPhone or iPad (Mobile App): Ah, here's the one that sometimes catches people out. There’s no visible paperclip! Instead, the magic happens when you tap inside the email itself.
- In a new message, just tap once in the main body where you'd type your text.
- A little black menu bar will appear above your keyboard.
- Tap the right arrow on that menu until you see the Photo Library icon (it looks like a small landscape picture).
- Tapping that will open your photos, letting you select the one you want to pop into the email.
Pro Tips for Sending Better Picture Attachments
Knowing how to attach a picture to an email is just the start. Sending it the right way? That’s what makes all the difference and ensures you look professional. It’s not just about getting the image from your screen to theirs; it's about making the whole process seamless for the person on the other end.
Think about it. A project manager sends some vital progress shots to a client. But the files are massive, straight from a high-res camera. They might bounce back or, worse, clog up the client's inbox and never even get seen. This is why getting a handle on image size is so crucial. Modern smartphones take incredible photos, but the files can easily hit the 10 MB to 25 MB attachment limit most email services have.
Keep Your File Sizes in Check
Before you even think about hitting 'send', take a quick look at the size of your photos. A good rule of thumb is if a picture is more than a couple of megabytes (MB), it's worth shrinking it down first.
You don't need fancy software for this. There are loads of free online tools, and both Windows and Mac have built-in options that can compress your image file without anyone noticing a drop in quality. For instance, if you're on a Mac, just open the image in Preview, head to 'Tools', and click 'Adjust Size'. From there, you can easily lower the resolution. It’s a tiny step that makes a huge difference.
Choosing the Right File Format
The format of your picture plays a bigger role than you might think. For the most part, you'll be dealing with JPEGs and PNGs. They can look identical, but they're built for different jobs.
To make it simple, I’ve put together a quick comparison to help you decide which one to use.
Choosing the Right Image Format for Your Email
| Feature | JPEG (Joint Photographic Experts Group) | PNG (Portable Network Graphics) |
|---|---|---|
| Best For | Photographs and complex images with lots of colours. | Graphics, logos, screenshots, and images with sharp lines or transparency. |
| File Size | Smaller, which is great for quick sending and saving inbox space. | Larger, as it preserves all original image data. |
| Quality | Loses a tiny bit of quality with each save (lossy compression). | Retains perfect quality (lossless compression). |
| Transparency | No support for transparent backgrounds (they'll appear white). | Excellent support for transparent backgrounds. |
For almost any photo you're emailing, JPEG is the way to go. It hits that sweet spot between good quality and a small file size, making it the most dependable choice for attachments.
Why Your File Names Matter
Last but not least, let's talk about file names. Sending an image called IMG_8392.JPG just looks a bit careless. It doesn't tell the recipient anything.
A simple change to something descriptive, like Client-Project-Progress-Shot-Oct24.jpeg, is so much better. It tells the person exactly what they're looking at before they even open it and makes the file a thousand times easier for them to find later on.
This isn't just about being organised; it's also a matter of trust and security. For businesses here in the UK, sketchy email attachments are a serious risk. In fact, research highlighted by the ICO's review of phishing threats shows that 91% of UK companies have been hit by successful email phishing attacks, many of which used dodgy attachments. A clear, logical file name helps show your recipient that what you've sent is legitimate and safe to open.
What to Do When Email Attachments Go Wrong
We’ve all been there. You hit ‘send’ on an important email, only to have it bounce back moments later. It’s frustrating, but nine times out of ten, the problem is one of three simple things that are surprisingly easy to fix.
The most common culprit is file size. Most email providers, whether it's Gmail or Outlook, cap attachments at around 25 MB. High-resolution photos can easily sneak over this limit, causing your email to be rejected before it even leaves the starting gate. The best fix is to resize the image before you attach it, just like we covered earlier.
My Picture is Stuck Inside the Email!
Another classic issue is when your photo appears embedded directly in the body of the email, instead of as a neat little downloadable file. This is called an "inline image," and while it might look slick, it’s a real pain for anyone who needs to actually do something with that picture, like your accountant trying to save a receipt.
This usually happens if you copy and paste the picture directly into your email draft. To prevent this, make a habit of always using the paperclip icon. This tells your email client you want to send a proper file, not just display an image.
Quick Tip: If you've already sent an inline image, tell the recipient to try right-clicking on it. They should see a "Save Image As..." option. It's a handy workaround that can save you from having to resend the email.
Finally, don't overlook the file name. An email with an attachment named IMG_8021.jpeg can sometimes look suspicious to aggressive spam filters. Giving your file a clear, descriptive name like March-2024-Phone-Bill.jpeg makes it look more legitimate and helps it get through to the recipient’s inbox without a fuss.
A Better Way to Manage Your Receipt Photos
Let’s be honest, there’s one type of photo attachment that’s a real headache for anyone self-employed: the humble receipt. The whole song and dance of taking a picture, saving it somewhere, digging it up later, attaching it to an email, and sending it off for your expenses is just plain tedious. It’s a classic chore that’s easy to put off, leading to a mad scramble at tax time.
This manual process isn't just inefficient; it can be a genuine security risk. For a UK contractor dealing with international clients, for instance, emailing receipt photos around can look a lot like phishing activity to a suspicious email filter. The stats are pretty grim, too. Out of 8.58 million cyber crimes hitting UK businesses last year, a staggering 93% were driven by phishing. You can read up on the latest phishing statistics to see just how big the problem is.
Say Goodbye to Manual Entry
So, what’s the alternative? Instead of adding to your email mountain, imagine just forwarding any email with a receipt photo to one specific address. That’s it. No more typing in details, no more messy folders, and fewer security headaches.
This is where a smarter, automated approach completely changes the game. By using a tool that plugs right into your accounting software, you can turn receipt management from a dreaded task into a background process that just happens.
Think about it: setting up a simple forwarding rule means every business expense is captured, organised, and archived without you even thinking about it. You get your time back and stop worrying about missing out on a potential tax deduction.
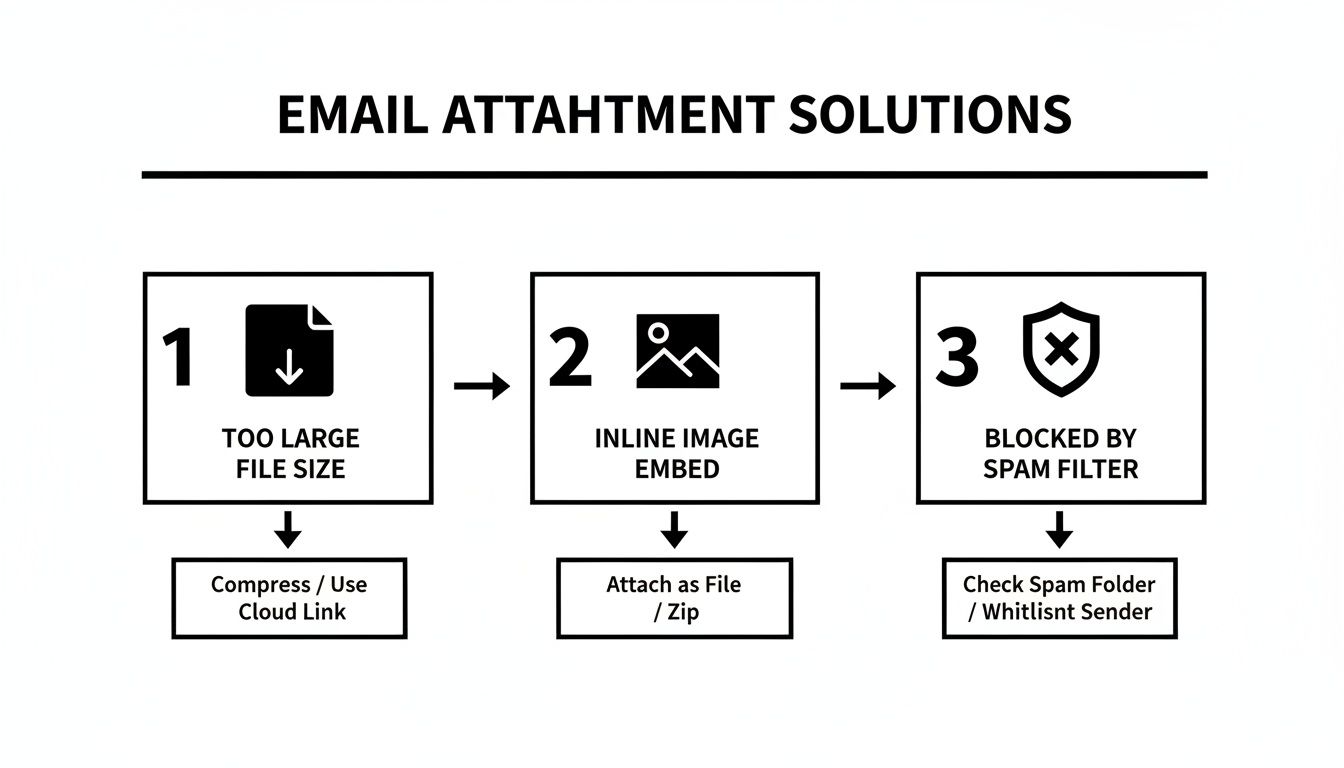
This flowchart maps out the typical journey of an email attachment gone wrong, from files being too large to getting caught in spam filters.
When you automate your receipts, you sidestep all of these common problems. A dedicated system is built to handle these images properly, every single time. If you want to explore this further, have a look at our guide on the benefits of using a receipt scanning app to get your finances in order.
A Few Common Questions About Emailing Photos
Even when you know the steps, a few tricky questions always seem to pop up. Let's tackle some of the most common ones I hear, so you can attach and send your pictures without a second thought.
What's the Real Limit for Email Attachment Size?
This is a classic "it depends" situation, but a safe bet is to stay under 10 MB for all your attachments combined.
Sure, giants like Gmail and Outlook will let you send up to 25 MB. The catch is that your recipient's email service might have a much lower limit. To make sure your email actually arrives, anything over 10 MB is much better off being sent as a link from a cloud service.
How Do I Send Lots of Photos at Once?
Attaching a dozen high-resolution photos directly to an email is a surefire way to clog up someone's inbox. There are a couple of much better ways to handle this.
Your best option is to upload the photos to a cloud storage service like Google Drive or Dropbox and just pop a shareable link into your email. Alternatively, you can bundle them all into a single .zip file. This compresses them and keeps everything neat and tidy in one download.
Ever sent a photo from your phone only to have it arrive looking blurry and unprofessional? That's usually your phone trying to be "helpful" by shrinking it. To prevent this, always look for an option to send the image at its "Actual Size" or "Original Quality".
Stop chasing down receipts and let them come to you. Receipt Router automates your expense management by capturing and organising receipts sent to a dedicated email address, saving you hours of manual work. Find out more at https://receiptrouter.app.