How to Automatically Forward Email From Outlook: A Complete Guide
Setting up automatic email forwarding in Outlook is all about creating a forwarding rule. You can go broad and forward all incoming messages, or get specific and only forward emails that meet certain criteria, like those from a particular sender or with words like "invoice" in the subject line.
Why Forwarding Outlook Emails Is a Game Changer for Your Workflow
If you're a busy UK freelancer or small business owner, you know an overflowing inbox isn't just an annoyance but a real threat to your financial organisation. Every minute you spend manually sorting messages is a minute you could be billing a client. This is exactly why knowing how to automatically forward email from outlook is such a vital business skill.
Imagine a system where every digital receipt and invoice is instantly whisked away, captured, and organised without you lifting a finger. It's the ultimate "set it and forget it" strategy that turns your inbox from a source of stress into a streamlined part of your admin workflow.
Reclaim Your Time and Reduce Errors
The most immediate benefit of setting up automatic forwarding is the sheer amount of time you get back. Forget about spending hours at the end of each month hunting down receipts from suppliers like Stripe, AWS, or your local office supply shop. Instead, you can create a seamless pipeline that does the work for you.
By directing specific emails to a dedicated service, you build a resilient financial system. This simple automation ensures no expense is missed, maximising your deductions and providing a clear, accurate picture of your business finances.
This isn't just about convenience; it’s a genuine improvement to how your business runs. Automating the process also slashes the risk of human error. We've all been there. A forgotten receipt or a mistyped invoice number can quickly spiral into compliance headaches and lost money.
A Growing Trend for Smart Businesses
Moving towards email automation isn't some niche tactic; it’s part of a bigger shift in how modern businesses handle digital communication. The email forwarding service market was valued at approximately USD 2.5 billion in 2024 and is expected to grow significantly. This trend really underscores how much businesses are relying on automated tools to boost efficiency.
For UK SMEs, getting on board with these solutions is a smart way to stay competitive and organised.
By creating a rule to send receipts to a tool like Receipt Router, you ensure they are automatically processed and perfectly matched with your accounting software. For example, check out how our integration helps streamline FreeAgent bookkeeping. It’s the first step toward a genuinely automated financial workflow.
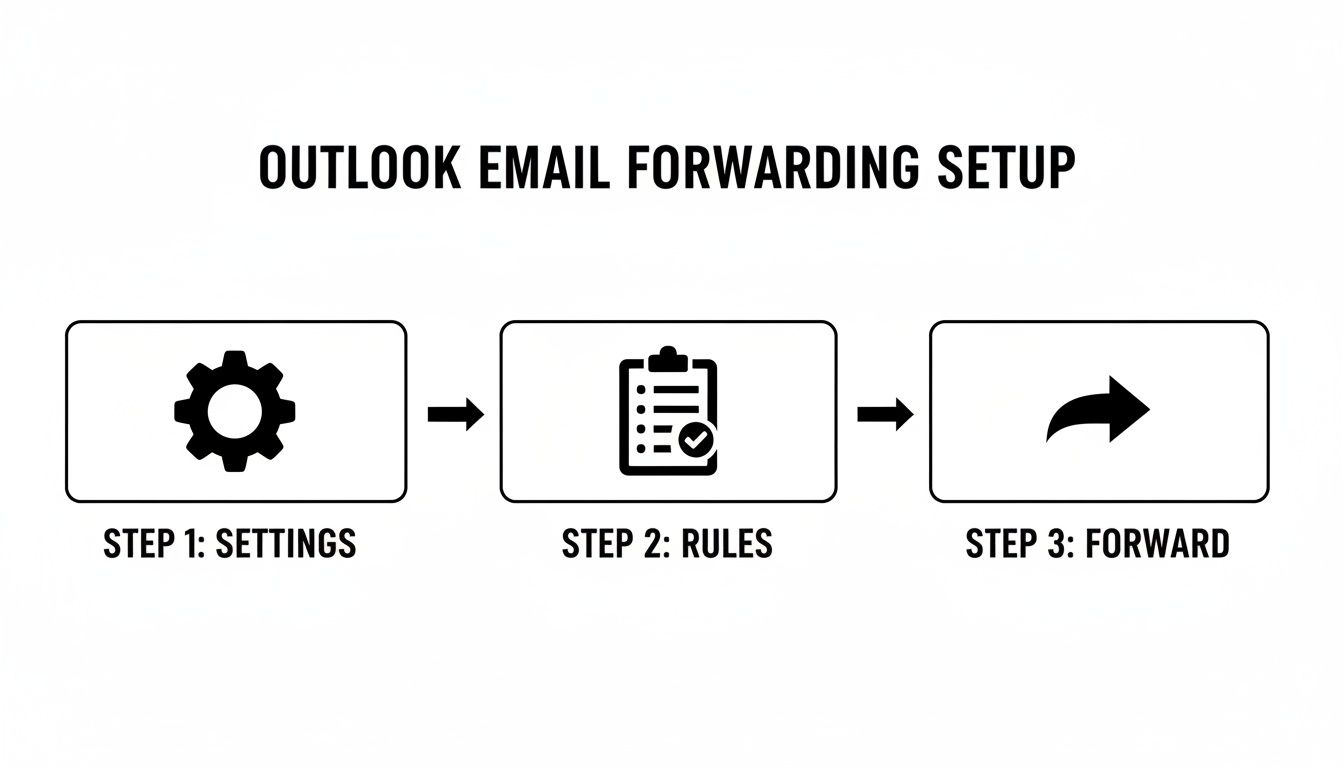
Setting Up Forwarding in Outlook on the Web
For those of us who practically live in a web browser, the quickest way to get email forwarding up and running is through Outlook on the web (what many of us still call Outlook.com). The best part? It's a server-side setting. That means once you set it up, it works 24/7 in the background, even when your computer is shut down. It's the perfect “set it and forget it” solution.
You’ve got two main ways to go about this. You could set up a blanket rule that forwards absolutely everything—every newsletter, every personal email, every receipt. Or, you can be a bit more clever and create a conditional rule that only forwards specific messages. For managing business expenses, the second option is almost always the right call. It keeps your primary inbox clean while making sure every important receipt lands exactly where it needs to.
Finding the Right Settings
First things first, let's get to the right screen. Log in to your Outlook.com account.
-
In the top-right corner, look for the gear icon (⚙️) and give it a click. This opens the main settings panel.
-
Scroll to the very bottom of that panel and choose View all Outlook settings.
-
A new window will pop up. From here, navigate to Mail > Forwarding.
You’ve arrived at the main hub for creating a simple, catch-all forwarding rule.
This is what you should be looking at—the main forwarding screen in Outlook's web settings.
Here, you can just tick a box to enable forwarding, pop in a destination address (like the one you get from Receipt Router), and decide whether to keep a copy of the messages.
But while that global forwarding works, the real power lies in using rules. Instead of clicking 'Forwarding', select Mail > Rules. This is where the magic happens, letting you tell Outlook precisely which emails to forward and giving you surgical control over your automation.
Creating a Smart Rule Just for Receipts
Alright, let's build a rule that’s smart enough to find and forward just your business receipts. This is the secret to automating your expense workflow without drowning another inbox in junk.
From the 'Rules' menu, click Add new rule. You’re basically going to create a simple three-part command for Outlook to follow.
-
Name Your Rule: Be descriptive. Something like "Forward Receipts to Receipt Router" works perfectly.
-
Add a Condition: This is your trigger. You can get really specific here. A great starting point is to set a condition where the Subject or body includes keywords like 'invoice', 'receipt', 'payment confirmation', or 'order summary'. You can stack up multiple keywords to make sure you catch everything.
-
Add an Action: Now, tell Outlook what to do. Choose Forward to and paste in your unique forwarding address. I'd also recommend adding a second action, like Mark as read or Move to a dedicated folder (I use one called 'Processed Receipts'). It's a simple step that keeps your main inbox tidy.
A Quick Pro Tip: If you ever decide to use the simple, global forwarding option, always tick the box to "Keep a copy of forwarded messages". Think of it as a crucial backup in your Outlook account. It ensures you never lose an important financial document if something goes sideways.
Once you've got it all set up, hit 'Save'. Your rule is now live. From this moment on, any email that meets your criteria will be automatically whisked away to its destination. This is how you create a truly hands-free system for your financial admin and automatically forward emails from Outlook the right way.
For those of us who live and breathe in our inboxes, the Outlook desktop app is more than just a mail client—it's mission control. While the web version is handy for a quick check-in, the full-fat desktop application for Windows and Mac gives you far more firepower for managing complex email workflows.
Getting to grips with automatic forwarding on the desktop app is key if you want precise control, especially for something as important as automating your expense management.
The Power of the Rules Wizard
Unlike the simple on/off switch you find in the web app, setting up forwarding on the desktop client is done through the Rules and Alerts wizard. Think of it less as a setting and more like building a mini-program for your inbox. It's an incredibly powerful tool that lets you create specific, reliable automations that just work, humming away quietly in the background.
The general idea is always the same, whether you're on the web or desktop: find your settings, create a rule, and tell it what to forward.
This process gives you the control needed to build a truly robust system.
Creating a Forwarding Rule from Scratch
First things first, fire up your Outlook desktop app.
If you're on Windows, you’ll navigate to File > Manage Rules & Alerts. For Mac users, the path is a little different—look for Rules in the main menu bar, then click Edit Rules. This is your entry point to the Rules Wizard.
From there, you’ll start a new rule, choosing the option to "Apply rule on messages I receive." The next screen is where the real magic happens: defining your conditions. This is the most important part of getting your receipt forwarding right.
-
Filter by sender: You can tell Outlook to only grab emails from specific addresses, like
receipts@amazon.co.ukorbilling@adobe.com. -
Scan for keywords: A better approach is often to look for "specific words in the subject or body." Terms like 'receipt,' 'invoice,' or 'your order' are perfect for this.
-
Combine conditions for accuracy: For the best results, use multiple conditions. For instance, you could create a rule that looks for emails from a specific sender and containing the word 'receipt' in the subject. This combo is brilliant for weeding out marketing fluff from the same company.
With your conditions locked in, you need to tell Outlook what to do. Choose the action "forward it to people or a public group." This is where you'll paste in your unique forwarding address, like the one Receipt Router provides.
One crucial detail: For POP or IMAP accounts, rules created in the desktop app only run while Outlook is open and running on your computer. However, if you're using an Exchange or Microsoft 365 account, the rules are server-side, meaning they work 24/7, even when your computer is off.
Important Settings to Get Right
As you finalise the rule, you’ll see a checkbox for "stop processing more rules." I strongly recommend ticking this. It ensures that once your forwarding rule runs on an email, Outlook won't apply any other rules to it. This simple step prevents frustrating conflicts, like another rule accidentally archiving your receipt before it has a chance to be forwarded.
Another common pitfall is attachments. The standard "forward" action should include them by default, but you should always send a test email with a PDF attached to be absolutely sure. A forwarded receipt email is pretty useless without the actual invoice attached to it.
Outlook Forwarding Setup Web vs Desktop
So, when should you use the web app versus the desktop client? It really comes down to the level of control you need. The web version is quick and easy for simple, all-encompassing forwarding, but the desktop app is the clear winner for creating detailed, specific automations.
Here's a quick comparison to help you decide which is right for your needs.
| Feature | Outlook on the Web (Outlook.com) | Outlook Desktop App (Windows/Mac) |
|---|---|---|
| Where to Find It | Settings > Mail > Rules or Forwarding | File > Manage Rules & Alerts |
| Rule Complexity | Simple, with fewer filtering options. | Advanced, allowing for complex and multi-layered conditions. |
| How It Runs | Always on (server-side). | Server-side for Exchange/M365; only when open for POP/IMAP. |
| Best Used For | Quick, straightforward forwarding. | Detailed, specific filtering and complex automation workflows. |
Ultimately, while the web app gets the job done for basic tasks, the desktop app provides the surgical precision required to build a truly automated financial workflow you can rely on.
What to Do When Admin Restrictions Get in the Way
So, you’ve followed all the steps to set up automatic forwarding, but Outlook hits you with an error message. It’s a frustratingly common problem, especially if you’re using an email address from your company or a client. Rest assured, you haven’t done anything wrong—you’ve just bumped into a security measure put in place by an IT administrator.
Most IT departments disable external forwarding by default, and for good reason. It’s a major security precaution. Think about it: if an account gets compromised, a simple forwarding rule could become a silent, automated leak of sensitive company data to an outsider. This is a serious compliance risk for UK businesses.
In fact, the Information Commissioner's Office (ICO) often cites misdirected emails as a leading cause of data protection breaches. That’s why Microsoft itself recommends that administrators block or at least heavily control external forwarding in Exchange Online. For freelancers and small businesses, acknowledging these security concerns is the first step towards getting your request approved. You can read more about these official Microsoft security recommendations on cerkl.com.
How to Make Your Case to IT
Don’t see this as a dead end. Instead, treat it as a chance to have a productive chat with your IT admin or your client's tech support. The key is to shift the narrative. This isn't just about making your life easier; it's about implementing a smarter, more secure business process.
Simply asking them to "turn on forwarding" will likely get you a swift 'no'. You need to build a proper business case.
-
Be precise. Make it clear you don't want a blanket rule to forward all your mail. You need a very specific rule that only forwards non-sensitive, operational emails—like receipts and invoices—to a dedicated service.
-
Frame it as a security upgrade. Explain that using a secure, specialised service like Receipt Router is much safer than the alternative of manually downloading PDFs and re-uploading them, which often leaves stray copies of documents on local drives.
-
Focus on efficiency. Position your request as a productivity booster. Automating receipt capture saves valuable time, minimises human error, and keeps financial records perfectly up-to-date.
The Right Way to Ask Your IT Administrator
When you reach out, be professional and clear. An email that spells out exactly what you need and why is often the best approach.
Here’s a template you can adapt:
"Hi [IT Admin Name],
I need to set up a specific Outlook rule to automatically forward our business receipts to a secure expense management service called Receipt Router.
This automation will help us streamline our financial admin, boost accuracy, and stay compliant. The rule would be tightly controlled to only forward emails containing keywords like 'invoice' or 'receipt' from our usual suppliers.
Could you please assist by enabling external forwarding just for this specific purpose on my account?"
This approach demonstrates that you've considered the security side of things and are proposing a controlled, low-risk solution. By clearly outlining the business benefits, you’re far more likely to get the go-ahead you need to automatically forward email from outlook and get your system working.
Advanced Tips for a Flawless Forwarding System
Once your basic forwarding rule is up and running, it's time to refine it into a perfectly tuned, automated workflow. Moving from a functional setup to a flawless one is all about layering in specific conditions and thinking a few steps ahead. This is how you make sure you’re only forwarding genuine receipts, leaving the marketing newsletters and other clutter behind.
A single keyword like ‘receipt’ is often too broad and can catch all sorts of unwanted emails. The real power comes from combining conditions. For instance, you can build a rule that looks for emails from a specific sender AND contains the word ‘invoice’ in the subject line. This kind of precision filtering is what creates a system you can actually trust.
Fine-Tuning Your Rule Conditions
To get this level of accuracy, you need to be very specific with your triggers. Instead of relying on one broad condition, think about creating several smaller, more targeted rules, or one single rule with multiple conditions stacked together. This strategy dramatically reduces the chance of forwarding irrelevant messages.
Here are a few common senders and keywords UK freelancers often deal with that you can use as a starting point for your own rules:
-
Sender Contains:
stripe.com,amazon.co.uk,aws-billing,adobe.com,gocardless.com,paypal.co.uk -
Subject Contains:
Your Invoice,Payment Confirmation,Order Summary,Receipt for Order
By combining these, you could create a rule that says: if the sender is stripe.com AND the subject contains invoice, then forward it. This is so much more reliable than a simple keyword search.
A Crucial Safety Net: Always, always add an action to your rule to keep a copy of forwarded messages. This is non-negotiable. It creates an essential backup in your main Outlook account, ensuring you never lose a critical financial document if something goes wrong with the receiving service.
Building a Resilient Workflow
The end goal is to build a system you never have to think about again. Once your rules are reliably forwarding receipts, the next logical step is to make sure they're properly archived. Just sending them to another folder simply creates a new organisational headache.
This is where services like Receipt Router come in. When an email is forwarded, it’s not just stored; it’s processed. The receipt is extracted, matched to the right transaction, and securely archived for you. You can even explore how to automatically back up every processed receipt by learning more about our Google Drive integration.
This combination of precise Outlook rules and a dedicated processing service is what transforms a simple email forward into a powerful, automated financial admin system. It saves hours of manual work and ensures your records are always complete and accurate.
Right, you've figured out how to get Outlook to automatically forward your emails. But where are you sending them? This is where a lot of people trip up.
Simply shunting all your receipt emails into another inbox or a cloud folder doesn't really solve the problem. It just moves the mess. You’ve essentially created a digital shoebox, and you're still left with the soul-crushing task of manually opening each email, downloading the receipt, and punching the details into your accounting software.
True automation isn't just about moving an email from A to B. It's about what happens when it gets to B.
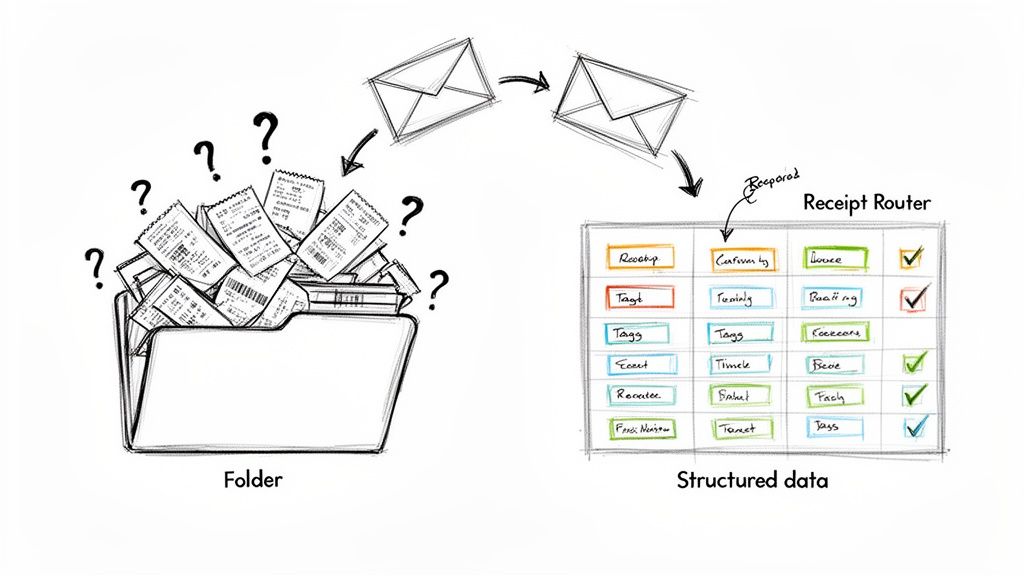
From Forwarded Email to Structured Data
This is where a dedicated service completely changes the game. Instead of creating a new pile of digital admin, a specialised tool can catch that forwarded email and instantly turn it into structured, usable financial data. It’s the difference between collecting paperwork and actually getting your bookkeeping done for you.
A smart service can do the heavy lifting automatically:
-
Extracts key details: It pulls the supplier name, date, and total amount straight from the receipt. No more squinting at PDFs.
-
Matches transactions: It intelligently finds the matching transaction in your accounts, linking everything up perfectly.
-
Organises the archive: It files everything neatly away, creating a secure, organised, and searchable record of your expenses.
This is the kind of automation that genuinely frees up your time. We're seeing more and more of these tools pop up, especially for SMEs, freelancers, and sole traders here in the UK who need smart, affordable ways to cut down on admin.
The True Value of Intelligent Automation
When you use a service built specifically for this, every forwarded receipt becomes an asset. It slot-s directly into your financial workflow the moment it arrives, rather than sitting on a to-do list, waiting for you to deal with it.
The goal isn’t just to forward emails; it's to eliminate the administrative burden they represent. A dedicated service closes the loop, turning a simple forwarding rule into a powerful, hands-free system for managing your business expenses.
This approach means nothing gets missed. Every claimable expense is captured, every invoice is logged, and your books stay accurate and up-to-date. By connecting your Outlook forwarding rule to an intelligent platform, you create a seamless pipeline that automates your receipt management from start to finish.
Receipt Router is designed to be that intelligent destination. It takes your forwarded receipts, automatically matches them in FreeAgent, and archives them securely. Ready to take the next step? See how it works at https://receiptrouter.app.